Secret Patterns Studio logo
Secret Patterns WoodworksA Secret Patterns Studio line
Document Library

Woodworking plans, documented like it matters.

Every dimension checked, every step pictured, every limit stated in plain words. This library holds the complete documents behind each Secret Patterns Woodworks guide — find a project, choose a document, and read every page before you spend a dollar.

2published guides
40manual pages to explore
32numbered build steps
18 + 2step loops + full-build films
23part rows in the records

Three kinds of document

Each guide ships as a small, complete documentation set. Nothing is a teaser: the manuals below are the real manuals, page for page.

Illustrated manuals

The build itself, written IKEA-simple: one action per step, a picture for every step, dual units everywhere, and check steps you may not skip. Print it first; it is the document the whole package answers to.

2 manuals · 40 pages

Step animations

The key steps as short animated loops, plus an exploded-view loop and a full-build film for each project — so you can watch the assembly order before you touch a board. Illustrations of the steps, never footage.

18 loops · 2 full-build films · MP4 / WebM / GIF

Overviews & records

The facts around the build: a spec sheet, a one-page printable build log, and the parts record — one canonical record per project, rendered as both parts.csv and parts.json, so the buy list and the cut list can never disagree.

2 parts records · 23 part rows

The document explorer

Find a project, choose a document, explore every page. The viewer below flips through the real, watermarked pages of each manual — the same pages the buyer prints.

Document
WD-01 manual, page 1
Page 1 of 24
Fit

WD-01 · Garage Work Table — 24-page illustrated manual. Use the thumbnails or arrow keys to explore every page.

The guides

What each project is, what the tier actually means in hours and tools, and exactly what is in the package.

WD-01Garage Work Table

$19digital guide

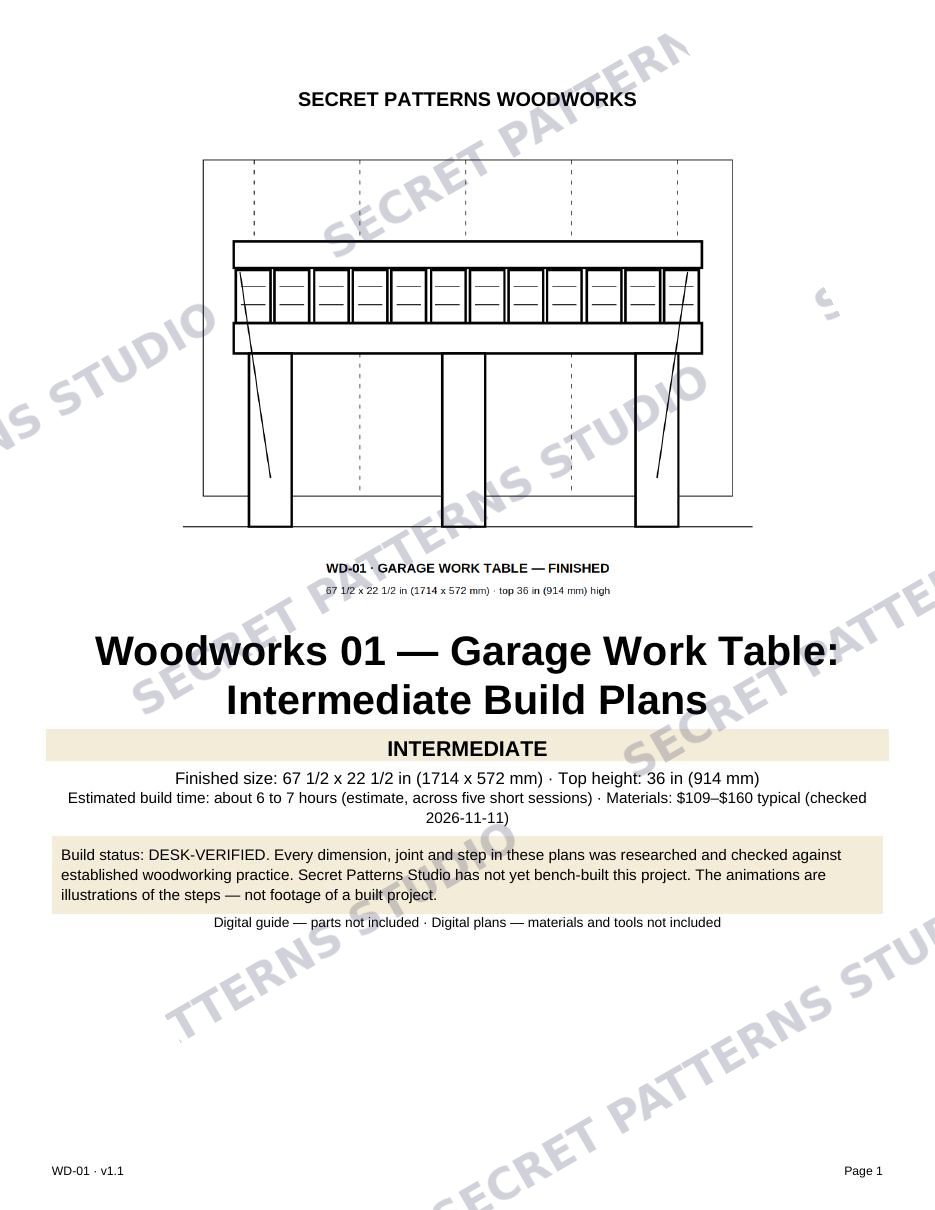
What it is. A wall-hung garage work table. The back edge rests on a ledger screwed into five wall studs; the front edge rests on an apron carried by three 4×4 legs; twelve slats lie across and tie the two together; two 45° braces stop racking. Joints are screws only; cuts are at 90° plus two traced brace angles.

Finished size: 67 1/2 × 22 1/2 in (1714 × 572 mm), top 36 in (914 mm) high. Working limits: 300 lb (136 kg) spread evenly; 100 lb (45 kg) on one point — the manual's “Why it holds” page shows the load path behind those numbers.

Build time: about 6 to 7 hours, across five short sessions (estimate). Materials: $109–$160 typical (checked 2026-11-11).

Build status: DESK-VERIFIED. Every dimension, joint and step in these plans was researched and checked against established woodworking practice. Secret Patterns Studio has not yet bench-built this project. The animations are illustrations of the steps — not footage of a built project.
Buy WD-01 — $19 Instant download after checkout.
  • Difficulty — Intermediate. The tier is measured, not a mood: Intermediate means 4–10 hours of build time and 7–12 required tools. This build sits in the band on both counts.
  • Tools: 7 required (tape measure, speed square, circular saw, drill/driver, reciprocating saw, clamps, level) plus required safety glasses and dust mask.
  • Steps: 20 numbered steps, S01–S20, including three check steps (S03, S09, S19).
  • In the package: the 24-page illustrated PDF manual · parts.csv + parts.json from one record (8 buy items, 6 cut pieces) · tools list, required vs optional · 10 step animation loops + 1 exploded-view loop + the full-build film · all 65 illustrations as SVG · one-page printable build log · licence.
  • Digital guide — parts not included. Digital plans — materials and tools not included.

Steps, pictured
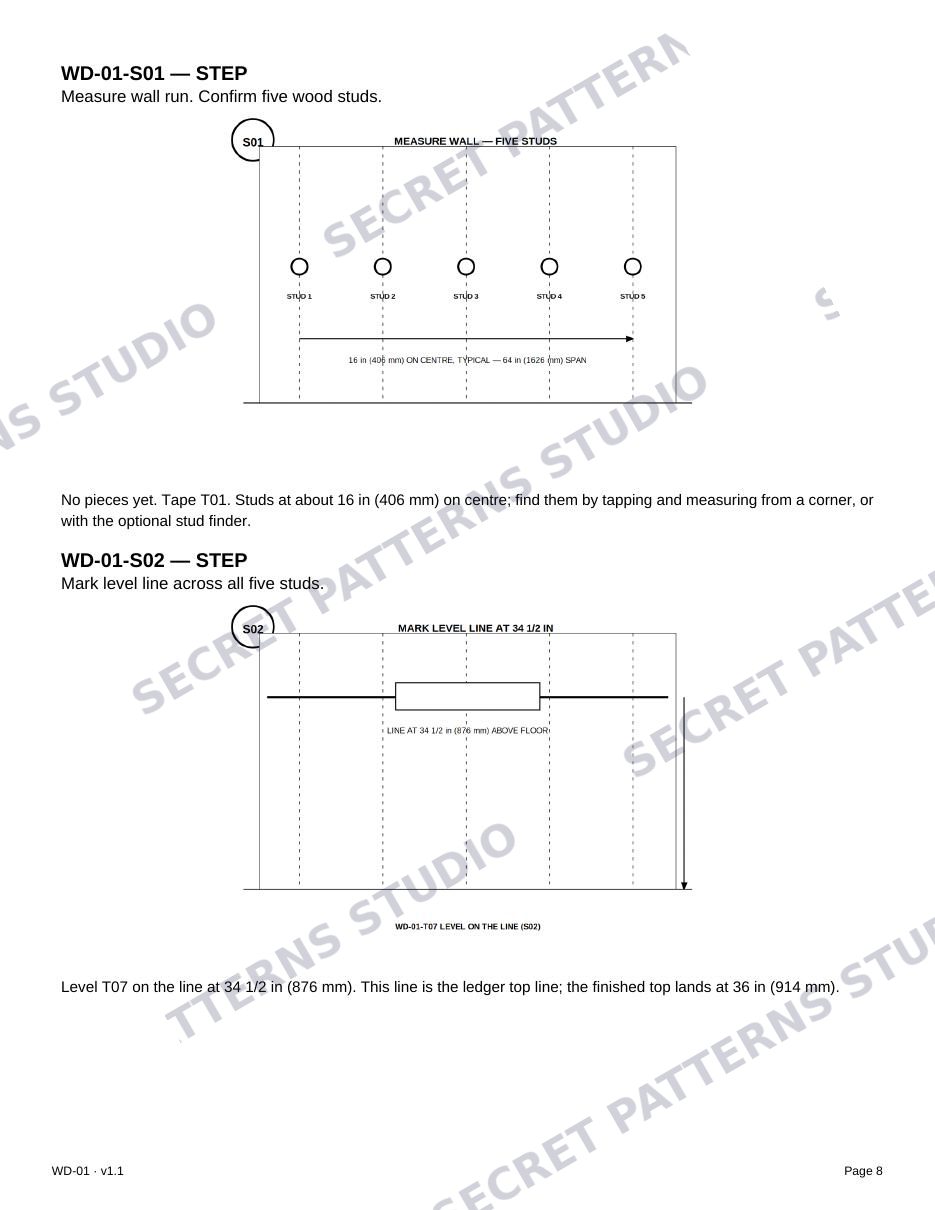
WD-01 manual page 8 — steps S01 and S02
Step S01 · Manual page 8

Measure wall run. Confirm five wood studs.

Studs at about 16 in (406 mm) on centre; find them by tapping and measuring from a corner, or with the optional stud finder.
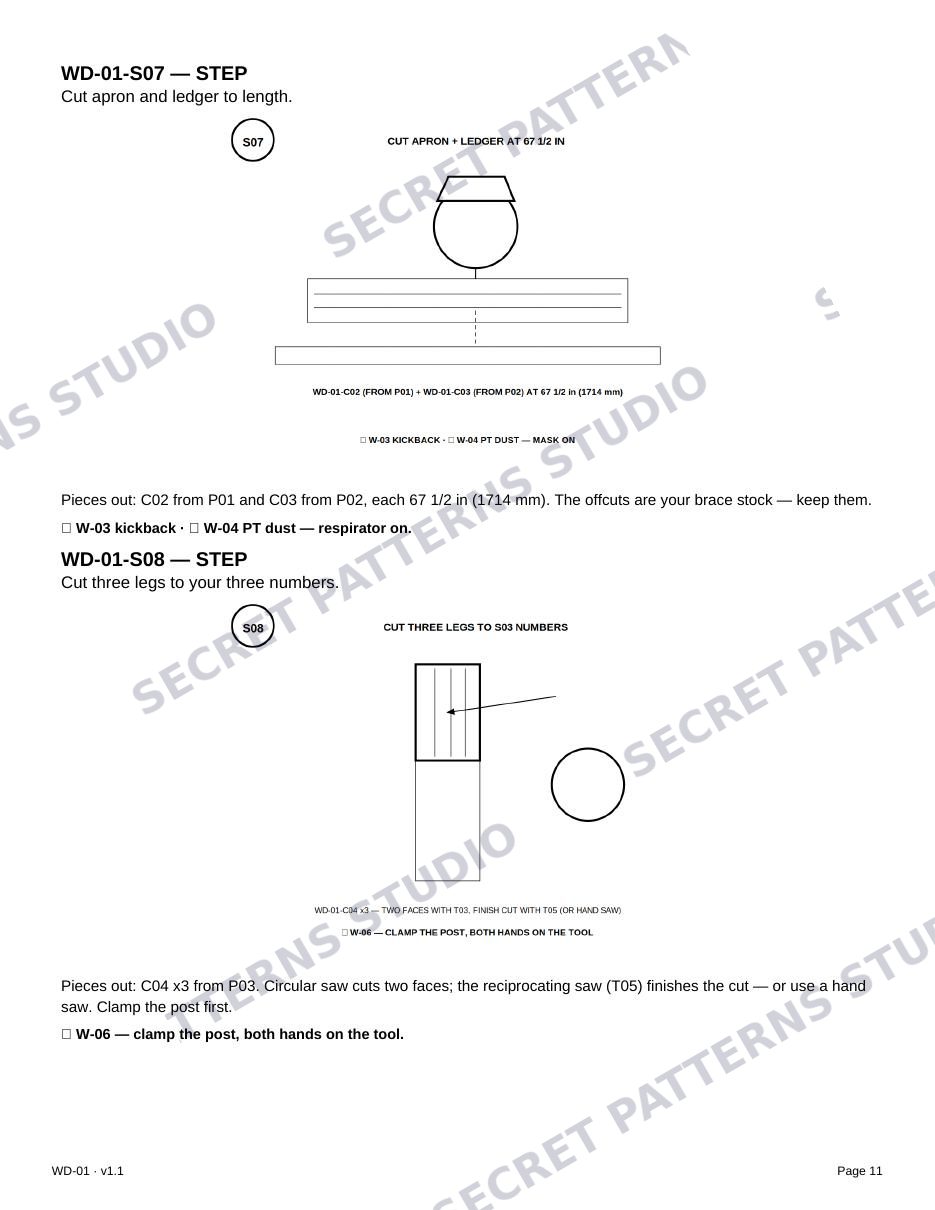
WD-01 manual page 11 — steps S07 and S08
Step S07 · Manual page 11

Cut apron and ledger to length.

Pieces out: C02 from P01 and C03 from P02, each 67 1/2 in (1714 mm). The offcuts are your brace stock — keep them.
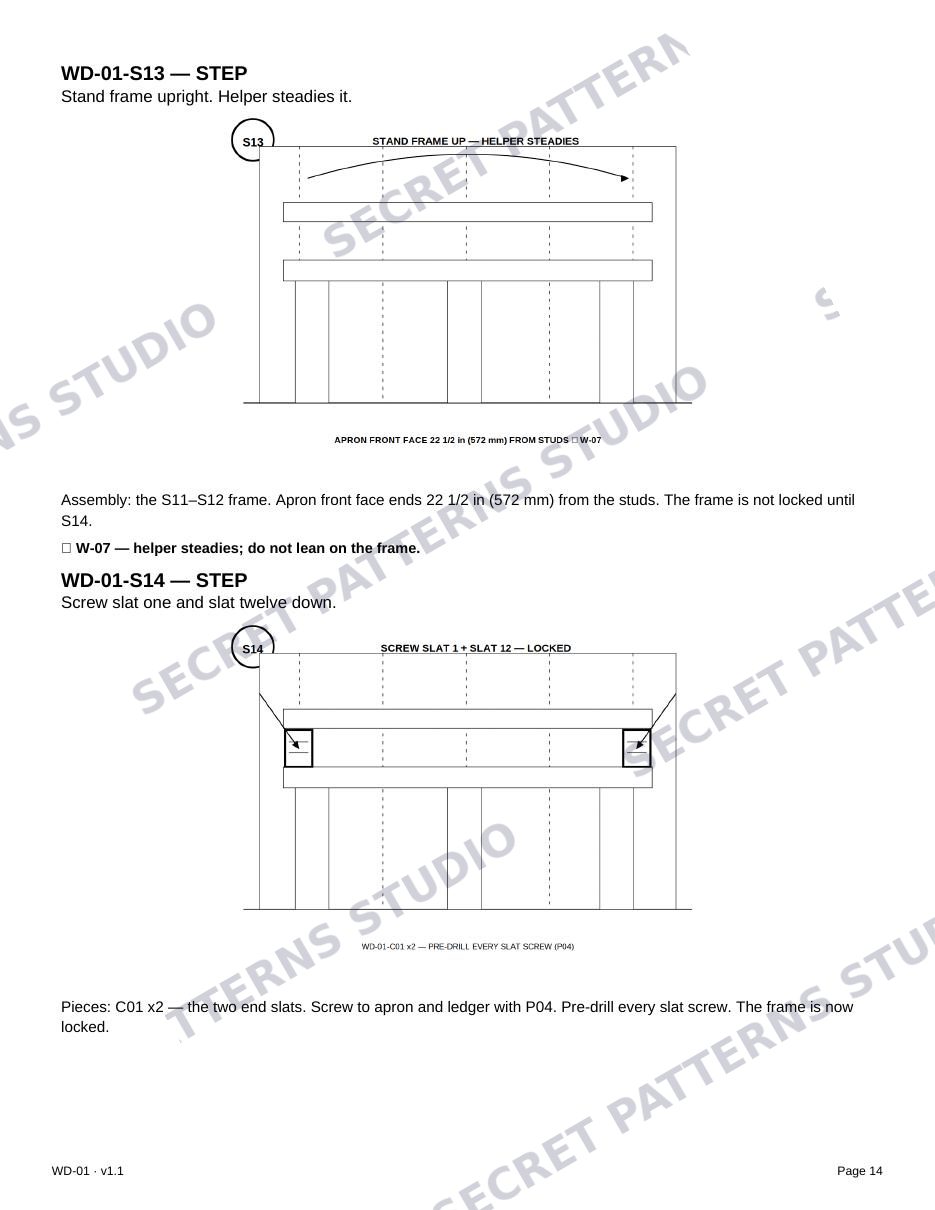
WD-01 manual page 14 — steps S13 and S14
Step S13 · Manual page 14

Stand frame upright. Helper steadies it.

Apron front face ends 22 1/2 in (572 mm) from the studs. The frame is not locked until S14.
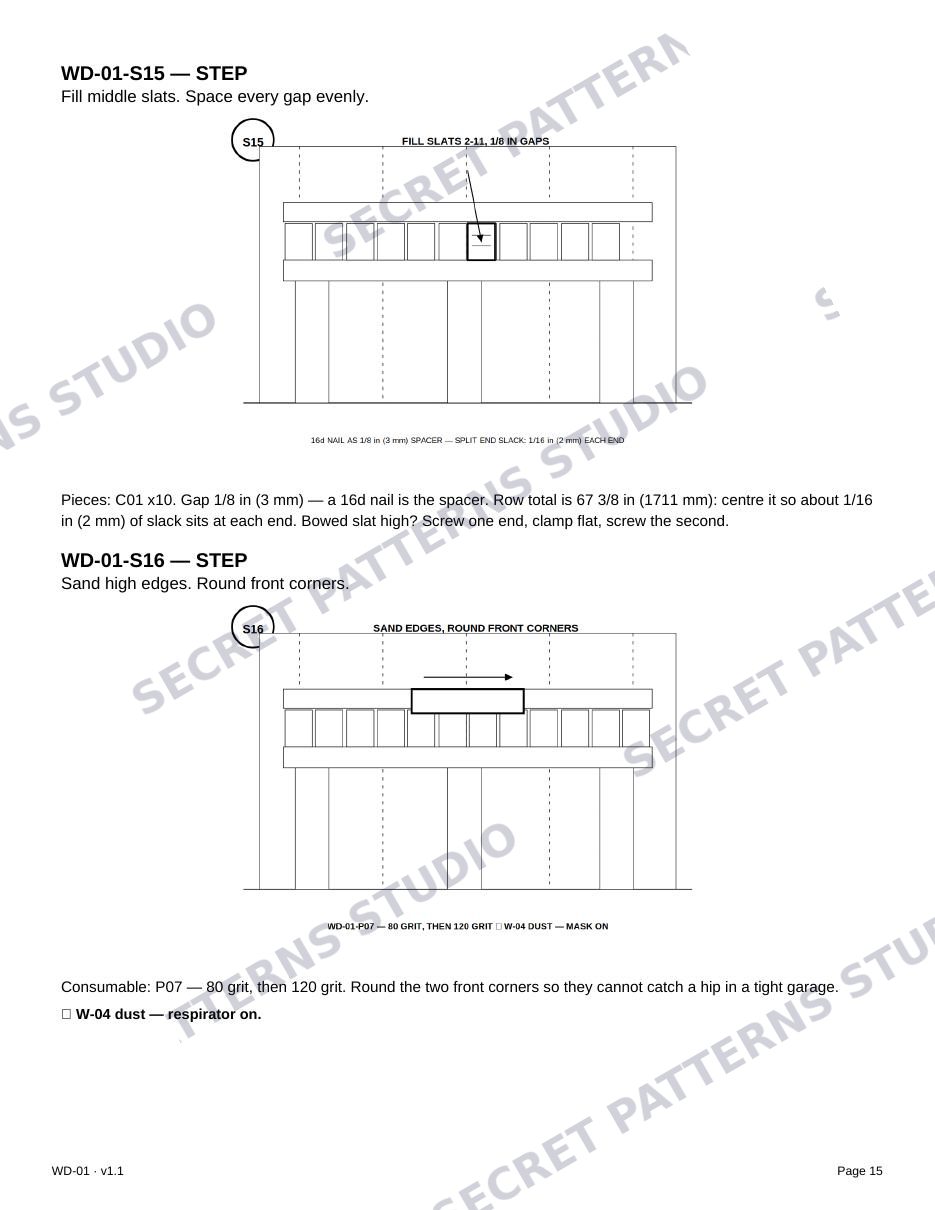
WD-01 manual page 15 — steps S15 and S16
Step S15 · Manual page 15

Fill middle slats. Space every gap evenly.

Gap 1/8 in (3 mm) — a 16d nail is the spacer.
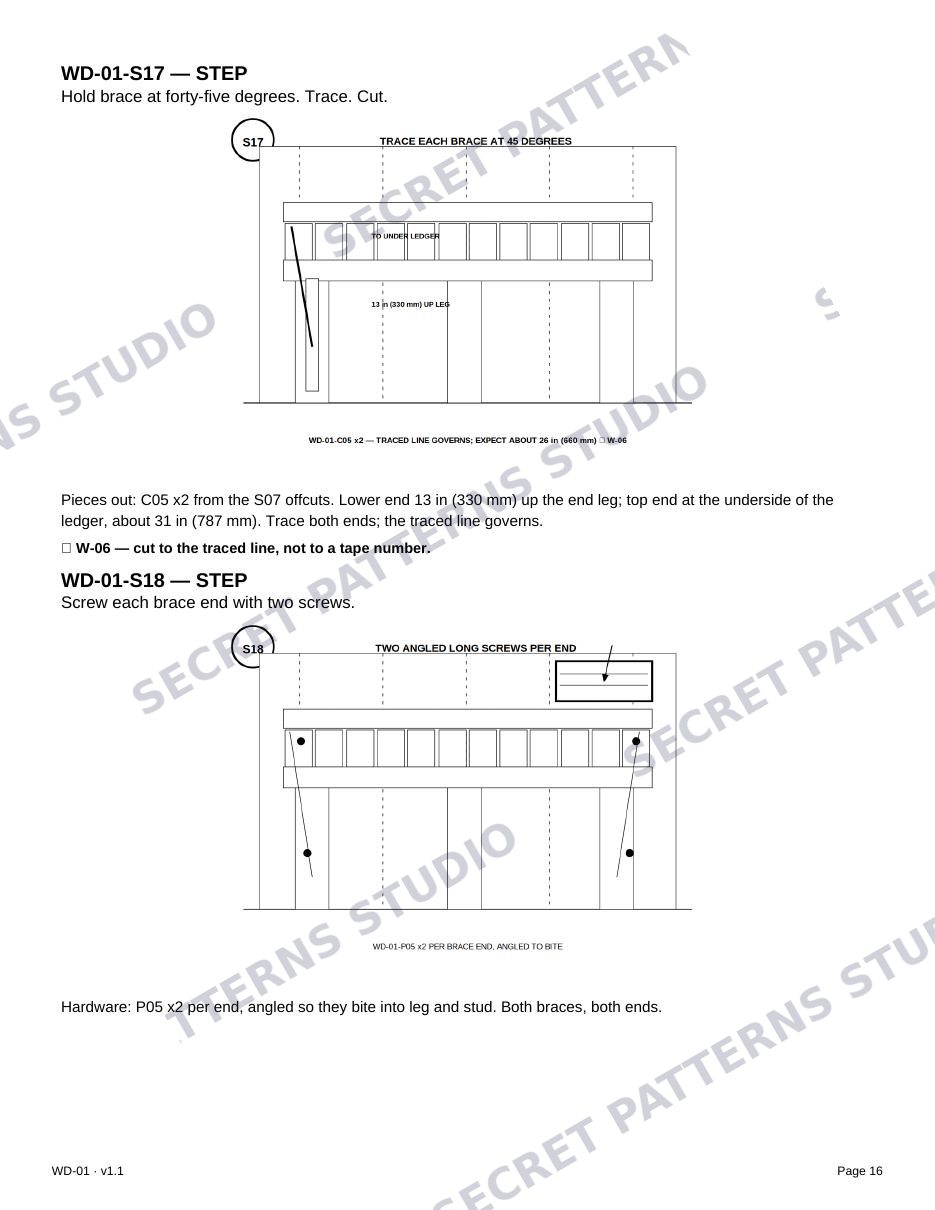
WD-01 manual page 16 — steps S17 and S18
Step S17 · Manual page 16

Hold brace at forty-five degrees. Trace. Cut.

Lower end 13 in (330 mm) up the end leg; top end at the underside of the ledger, about 31 in (787 mm). Trace both ends; the traced line governs.
WD-02Two-Tone Edge-Grain Serving Board

$12digital guide

What it is. Seventeen strips — nine hard maple, eight black walnut — glued edge-up in an alternating two-tone pattern with maple at both edges. The face of the finished board is genuine edge grain, and the build teaches the three skills beginners actually fail at: accurate ripping, a flat glue-up, and finishing.

Finished size: 18 × 12 × 3/4 in (457 × 305 × 19 mm). Build time: 2–3 hours of work plus the cure waits (estimate) — S06 waits a full 24 hours and S12 cures overnight, and both waits are steps, not footnotes.

Materials: two hardwood boards and four shop supplies, $58–$92 typical total (checked 2026-11-11).

Build status: DESK-VERIFIED. Every dimension, joint and step in these plans was researched and checked against established woodworking practice. Secret Patterns Studio has not yet bench-built this project. The animations are illustrations of the steps — not footage of a built project.
Buy WD-02 — $12 Instant download after checkout.
  • Difficulty — Easy. Measured on all four Easy tests: 6 or fewer required tools, glue-up joinery only, tolerance of ±1/16 in the design forgives, and a single-session build. This board passes all four.
  • Tools: 6 required (tape measure, speed square, circular saw with straight-edge rip guide, clamps ×4, random-orbit sander, cabinet scraper) plus required safety glasses and dust mask.
  • Steps: 12 numbered steps, S01–S12, including the S03 sort-and-check step.
  • In the package: the 16-page illustrated PDF manual · parts.csv + parts.json from one record (6 buy items, 3 cut pieces) · an ID mapping for every short manual ID · tools list, required vs optional · step animation loops for 6 steps + 1 exploded-view loop + the full-build film · one-page printable build log · licence.
  • Digital guide — parts not included. Digital plans — materials and tools not included.

Steps, pictured

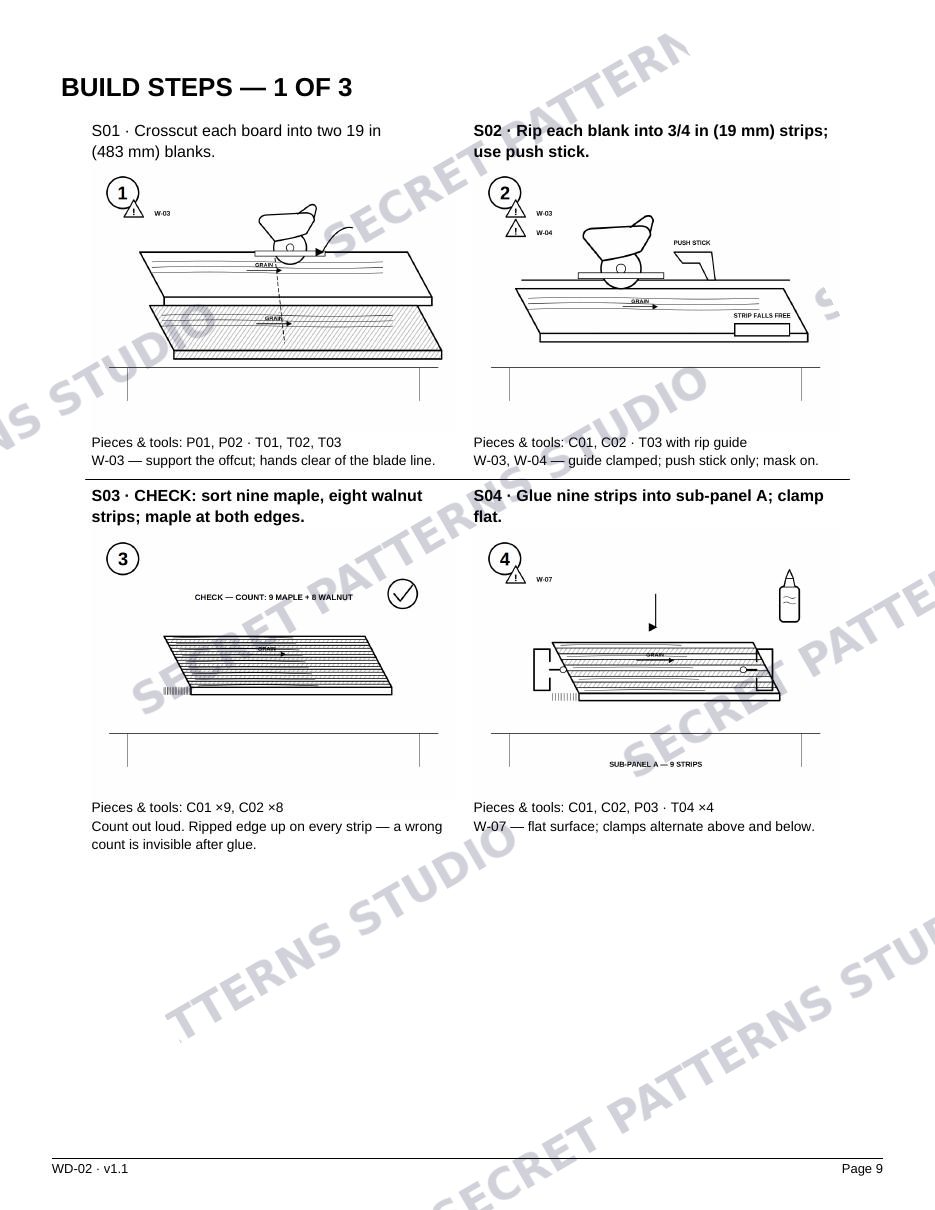
WD-02 manual page 9 — steps S01 to S04
Step S02 · Manual page 9

Rip each blank into 3/4 in (19 mm) strips; use push stick.

W-03, W-04 — guide clamped; push stick only; mask on.

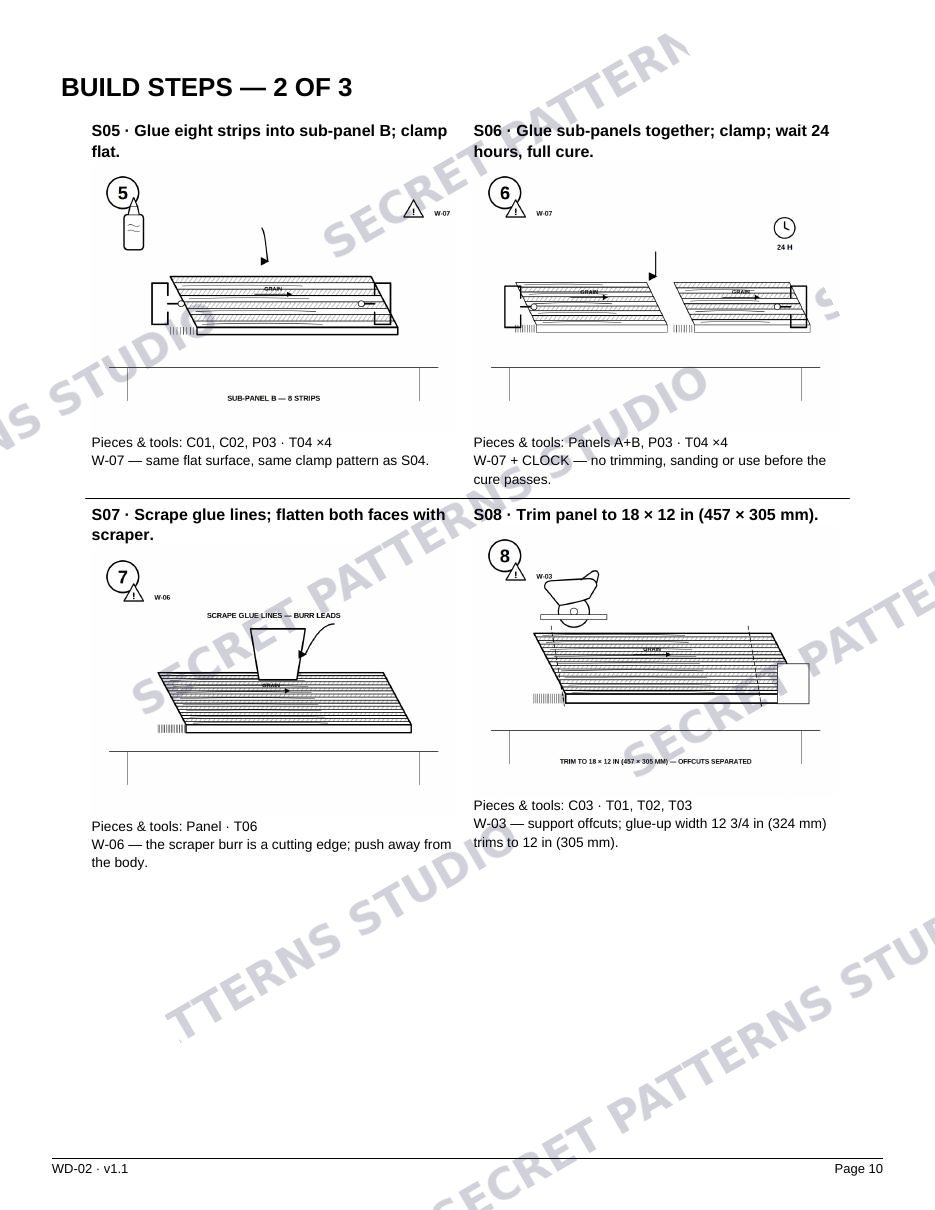
WD-02 manual page 10 — steps S05 to S08
Step S06 · Manual page 10

Glue sub-panels together; clamp; wait 24 hours, full cure.

W-07 + CLOCK — no trimming, sanding or use before the cure passes.

WD-02 manual page 11 — steps S09 to S12
Step S09 · Manual page 11

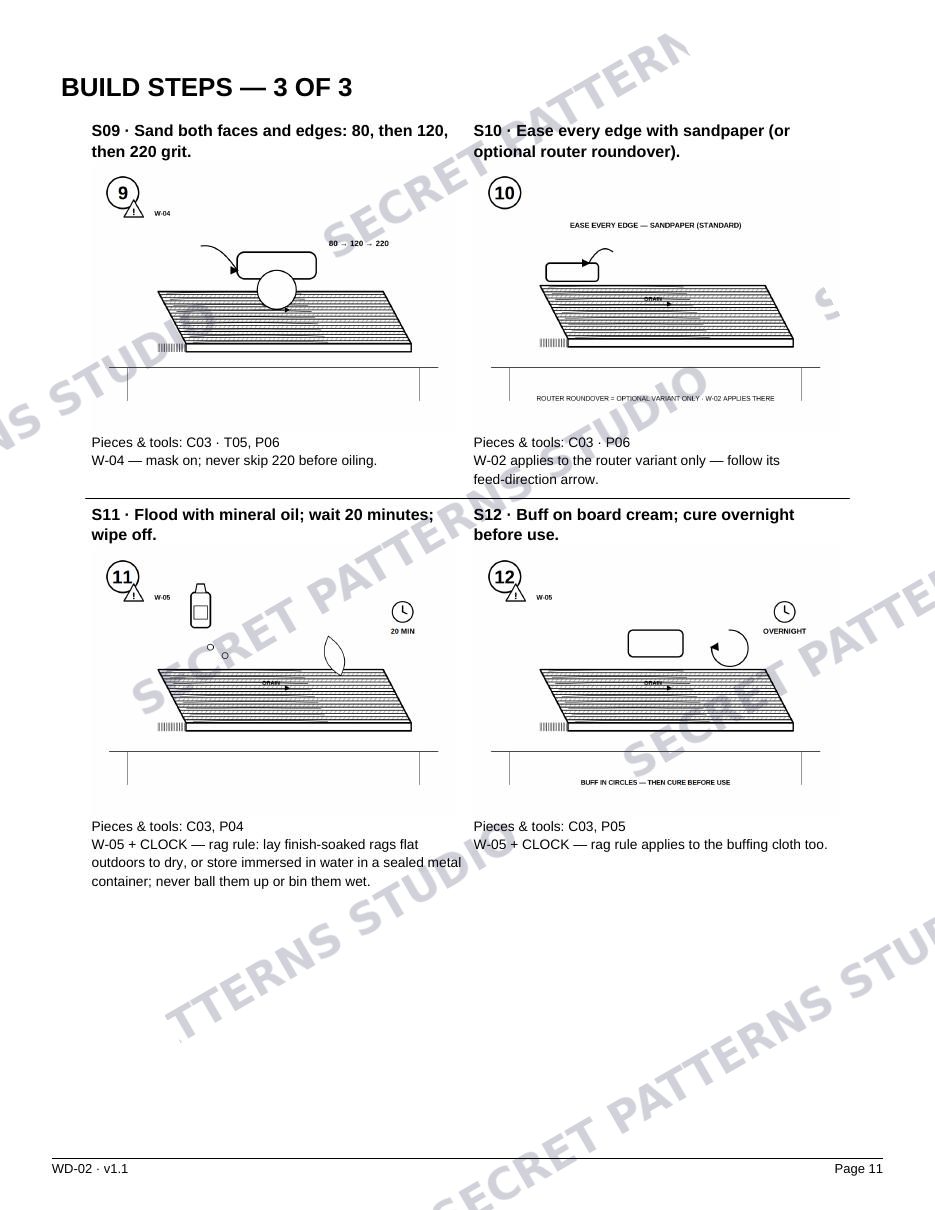
Sand both faces and edges: 80, then 120, then 220 grit.

W-04 — mask on; never skip 220 before oiling.

WD-02 manual page 11 — steps S09 to S12
Step S12 · Manual page 11

Buff on board cream; cure overnight before use.

With a clean cloth, buff a thin coat of beeswax board cream over both faces and edges in circles.

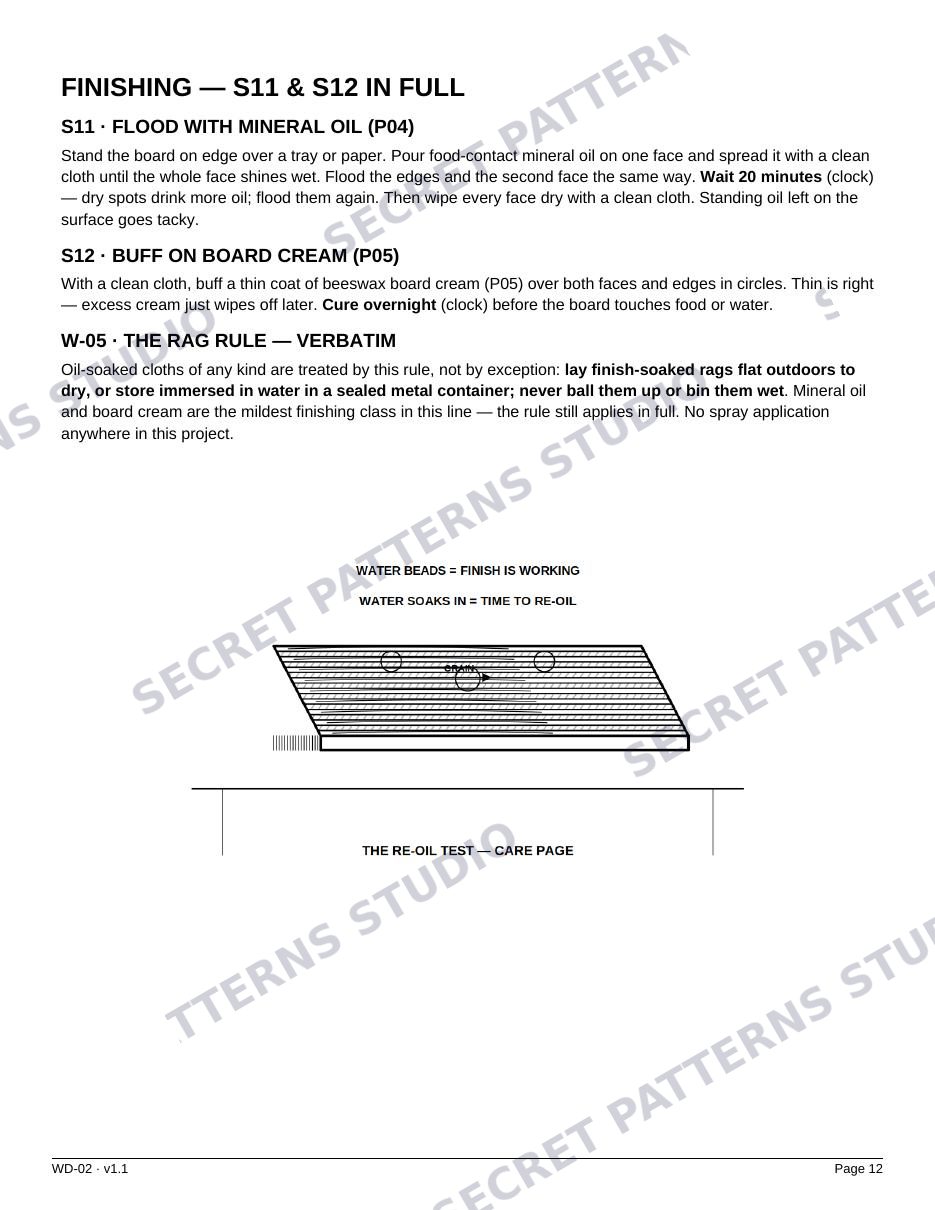
WD-02 manual page 12 — finishing, steps S11 and S12 in full
Step S11 · Manual page 12

Flood with mineral oil; wait 20 minutes; wipe off.

Stand the board on edge over a tray or paper. Pour food-contact mineral oil on one face and spread it with a clean cloth until the whole face shines wet.

How every document here is made

Make the invisible visible

Load paths, glue lines and the reasoning behind a number are drawn and explained, not left as folklore. Every manual carries a “Why it holds” section that shows its work — the ledger joint, the sixteen glue joints — with the limits stated beside the claims.

Every step a clear picture

One action per step, one illustration per step, and the same IDs everywhere: on the manual page, in parts.csv and parts.json, and in the animation filenames. If a step can be checked, it is a check step — and it is numbered like any other.

Unmistakably ours

Dual units on every dimension, pictograms for motion, clamping, waiting and measuring, and the desk-verified disclosure printed on page one of every manual — never buried in the back. When a number was checked on a date, the date prints with it.

In the workshop

Designed and in production. These projects join the library when their documents are complete — manuals first, listing second.

WD-03

Two-Step Shop Stool

Easy

In the workshop

WD-04

Floating Wall Shelves ×3

Intermediate

In the workshop

WD-05

Entry Bench with Shoe Shelf

Intermediate

In the workshop

WD-06

Farmhouse Dining Table

Advanced

In the workshop

WD-07

Sculpted Rocking Chair

Expert

In the workshop